Floating Shelves Easy to Install and Affordable
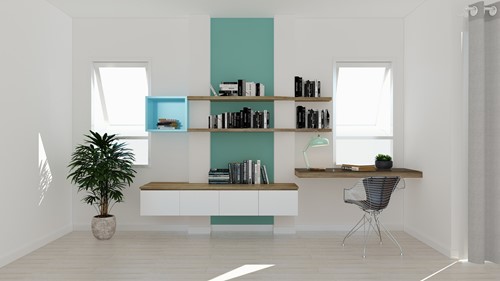
Floating shelves offer your space a more streamlined look. Your walls seem less cluttered, which allows your focus pieces to take center stage.
Because floating shelves require less space than traditional shelves, you can put them anywhere all while maintaining your floor space below. They can be any length you choose -- within reason. You can even work around more permanent features like a fireplace, doorway, outlet or window.
You'll be surprised just how easy and affordable it is to install floating shelves and home much they'll delight guests and prospective homebuyers alike. You'd expect something this elegant to require specialized tools and a lot of engineering knowledge to avoid collapse. But follow these simple steps and you'll be enjoying your own in no time.
What you'll need
- Floating shelf brackets
- 20mm paddle drill bit
- Electric drill - *Pro Tip* Borrow. Don't buy unless you do projects like this frequently.
- Stain, poly & brushes
- Palm sander
- Your hardwood of choice - Poplar, oak, maple, walnut or cherry works great.
How to create floating shelves
Here's your step-by-step guide.
Measure your space
Determine how large to make your shelves. To achieve a floating effect, avoid stopping them right at the edge of other features. Give it some space.
*Pro tip* - Mom & Pop hardware and lumber stores will often cut the wood for you, so you don't have to worry about getting a saw.
Drill holes for brackets
Each bracket has two 6-inch steel rods. Measure the halfway point between them and mark the wood where it will be against the wall. Drill a 1" wide hole into each shelf edge, 7" deep.
Sand & stain
It's time to sand and stain. This process is very straight forward. But do this outside because sawdust will fly everywhere. Sanding not only smooths any rough spots. It also helps the shelves hold a more even stain for a flawless finish.
*Pro tip* Test your stain on an extra piece of the same wood. Stains can be unpredictable depending on the hue of the wood, how it absorbs the dye, etc. You may need to mix two stains to achieve the desired darkness and color.
Find the studs & install brackets
Install brackets directly into the studs, spaced apart to align with the holes that you drilled into your shelves so that the brackets slid easily into those holes.
Arrange your shelves
Place your shelves over the wall brackets. Because of their design, floating shelves can hold significant weight. But that defeats the purpose. Less is more on a floating shelf. So plan and arrange pieces that accentuate each other.
That's how to build a floating shelf. Follow our blog for more helpful home maintenance and design tips.
About the Author

Tina Broyles, DRE 01009212 & NMLS 91630
Headline: Tina Broyles: Your Expert Real Estate Agent for Fremont, San Jose, and the Bay Area | eXp Realty
Bio:
As a dedicated real estate professional and a long-time resident of the California Bay Area, I have been proudly serving the real estate community since 1987. My mission is to provide my clients with unparalleled professionalism, in-depth market knowledge, and a caring approach that has resulted in a business built almost entirely on referrals.
Your Trusted Real Estate Advisor in the Bay Area
I specialize in the vibrant and diverse real estate markets of Fremont, Campbell, San Jose, Saratoga, Cupertino, Sunnyvale, Morgan Hill, Santa Clara, Mountain View, and Milpitas, CA. With over three decades of experience, I have a deep understanding of these communities and can provide you with the insights you need to make informed decisions.
One of the most consistent compliments I receive from clients is about my responsiveness to their needs. Your goals are my top priority, and I am committed to being there for you every step of the way. I am honored to have been voted "Best of Milpitas" every year from 2000 to 2020, a testament to my dedication to my clients and my community.
About My Business: eXp Realty
As part of the innovative eXp Realty team, I bring a diverse set of skills and a commitment to excellence to every transaction. We leverage cutting-edge technology that is "beyond expectation" to provide you with a seamless and efficient real estate experience. My team and I offer the perfect balance of experience and professionalism to help you achieve your real estate dreams in the Bay Area.
Community Involvement
I believe in giving back to the community that has given me so much. I am a happily married mother of two and a proud grandmother to two beautiful granddaughters, Audrina and Chesney. In my free time, I enjoy golfing, exercising, and my weekly Bible study. I am also passionate about serving the homeless community in Milpitas and supporting our local businesses.
I would be honored to get to know you and your family and put my extensive real estate experience to work for you.
Credentials: